Replacing Head Unit (Stereo / Radio / CD Player)
If you are interested in replacing the head unit / radio in your 2006 or 2007 RAV4, this post may be very helpful for you. For starters, let me say that if you are taking out the stock system, you will need a dash mounting kit in order to completely install your new unit. These kits aren't readily available on the market yet - you can order them online, but finding them in your local store may prove to be difficult. The two best places to purchase a mounting kit is Toyota Japan (~$80) or Crutchfield.com (~$25) plus shipping. If you haven't purchased your head unit yet, order one from Crutchfield and they will include the dash mounting kit for free (along with installation instructions and speaker adapters if you also buy speakers). Just make sure you have everything you need gathered together, because you may get stuck needing a part that you can't just buy at the local parts store.
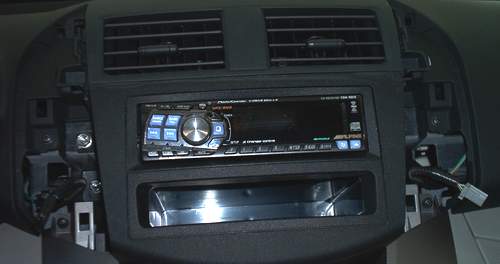
I went ahead and installed an old unit that I had in my Blazer - a very nice Alpine CDA-9815. It's a couple years old, but was top of the line when it came out about 3 years ago... so it's still a great unit. Anwyays, I went ahead and ordered the mounting kit from Crutchfield (ok, I really wanted the stereo in first, so I installed it before the Crutchfield kit got here... it fit just fine in the dash without it, the trim just didn't match and it was obviously missing some superficial parts). So I knew I wouldn't be able to finish the install, but I did as much as I could.
The first step to installing a new unit is taking the old one out. I started by slipping a removal tool under the trim pieces next to the head unit:
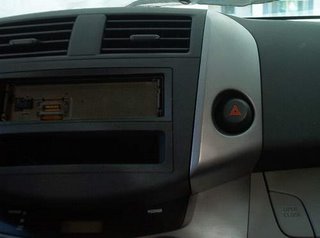

Once the removal tool was under the trim piece, I gently pulled it straight back towards me until the quick connect insert slid out of the dash. After the bottom piece of trim was loose, I simply pulled straight back on the top portion of the piece also. The trim piece popped out and I undid the wiring harness attached to the backside (for the hazard lights [r] and Auto Slip Differential [l] buttons). Once both sides of trim have been removed, four (4) 10mm bolts are the only things left to take out in order to remove the unit.


After the bolts are removed, just undo the wiring harnesses at the back of your stock radio and install the aftermarket harness with your new head unit (you will need an aftermarket Toyota harness, and the harness that comes with your new radio - splice the wires together by color code, hook it up to your car harness and you'll be ready to go).
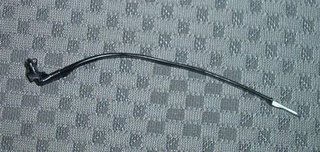
The one thing you need to be careful about is prying the trim pieces out of your dash. I used part of an old head unit removal tool and placed electrical tape around it to protect the plastic trim. Other people have used a plastic pry tool from Scosche (pick it up at Walmart) that comes bundled with some car audio kits. Here's a pic of the tool I used:
I went ahead and installed an old unit that I had in my Blazer - a very nice Alpine CDA-9815. It's a couple years old, but was top of the line when it came out about 3 years ago... so it's still a great unit. Anwyays, I went ahead and ordered the mounting kit from Crutchfield (ok, I really wanted the stereo in first, so I installed it before the Crutchfield kit got here... it fit just fine in the dash without it, the trim just didn't match and it was obviously missing some superficial parts). So I knew I wouldn't be able to finish the install, but I did as much as I could.
The first step to installing a new unit is taking the old one out. I started by slipping a removal tool under the trim pieces next to the head unit:


Once the removal tool was under the trim piece, I gently pulled it straight back towards me until the quick connect insert slid out of the dash. After the bottom piece of trim was loose, I simply pulled straight back on the top portion of the piece also. The trim piece popped out and I undid the wiring harness attached to the backside (for the hazard lights [r] and Auto Slip Differential [l] buttons). Once both sides of trim have been removed, four (4) 10mm bolts are the only things left to take out in order to remove the unit.

After the bolts are removed, just undo the wiring harnesses at the back of your stock radio and install the aftermarket harness with your new head unit (you will need an aftermarket Toyota harness, and the harness that comes with your new radio - splice the wires together by color code, hook it up to your car harness and you'll be ready to go).
The one thing you need to be careful about is prying the trim pieces out of your dash. I used part of an old head unit removal tool and placed electrical tape around it to protect the plastic trim. Other people have used a plastic pry tool from Scosche (pick it up at Walmart) that comes bundled with some car audio kits. Here's a pic of the tool I used:

posted by CCG_Gal at 10/28/2006 05:46:00 PM
![]()
![]()

0 Comments:
Post a Comment
<< Home